Making pliable, chewy dried fruit in the oven is totally possible, and can save you lots of sugar from store-bought products. Check out the results of my cooking experiment using three different fruits below!

 For those who are unfamiliar with my “conquest”, I set out at the beginning of 2015 with a new cooking resolution for every month - January was making homemade Larabars and February I took on making fresh spring rolls. So I was super excited to try out experimenting with making dried fruit in the oven because I LOVE DRIED FRUIT. When I was in Turkey and Israel this past year, I pretty much subsisted off dried dates and dried figs. I really can’t keep them around the house. However, most store-bought dried fruit contains a lot of extra sugar and preservatives to keep it chewy, fresh, and sweet. Trader Joe’s have some awesome unsulfured, unsweetened dried fruits, and I figured I could try and recreate them at home so I wouldn’t have to buy it any longer!
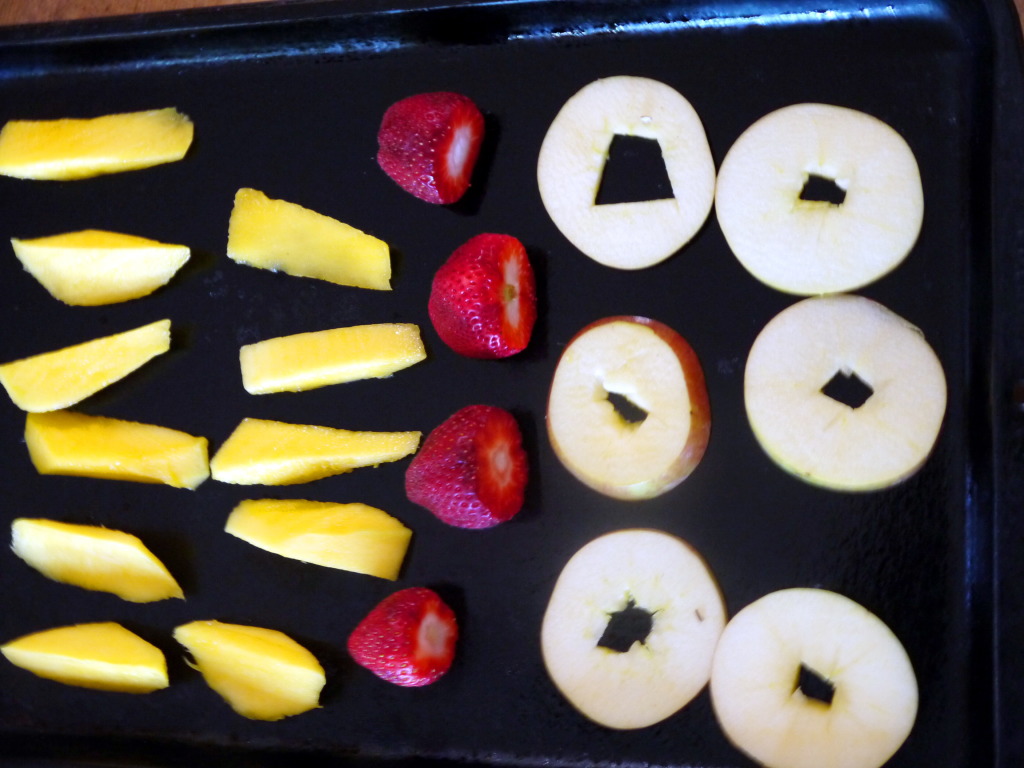
 So I chopped up my experimentation subjects (ew?), and set my own to a low, low temperature of 140 degrees. And then I let the fruit sit in their all day. I turned it every so often. The mangoes were the first to dry properly, and I removed them at 8 hours. The apples, I took out after 12 hours but they crisped up once removed from the oven and turned into apple chips, but then became more pliable the next day. And the strawberries? I cranked it up to 190 degrees after removing the apples and those guys probably could have stayed in the oven for another couple hours but I took them out after 14. The fruit shrinks down like CRAZY, so make sure to slice relatively big pieces of each and choose large strawberries.

 I went to Trader Joe’s to see how much money I was saving by making my own dried fruit, and that’s when I was thoroughly disappointed. A bag of unsulfured, unsweetened mango cost only $2.99! The mango itself cost about that much, and I spent all day tending to it’s needs in the oven! So I set out to write this blog post about how disappointed I was in my dried fruit experimenting. I wasn’t sure if it was worth it. And then I actually sampled my test subjects.

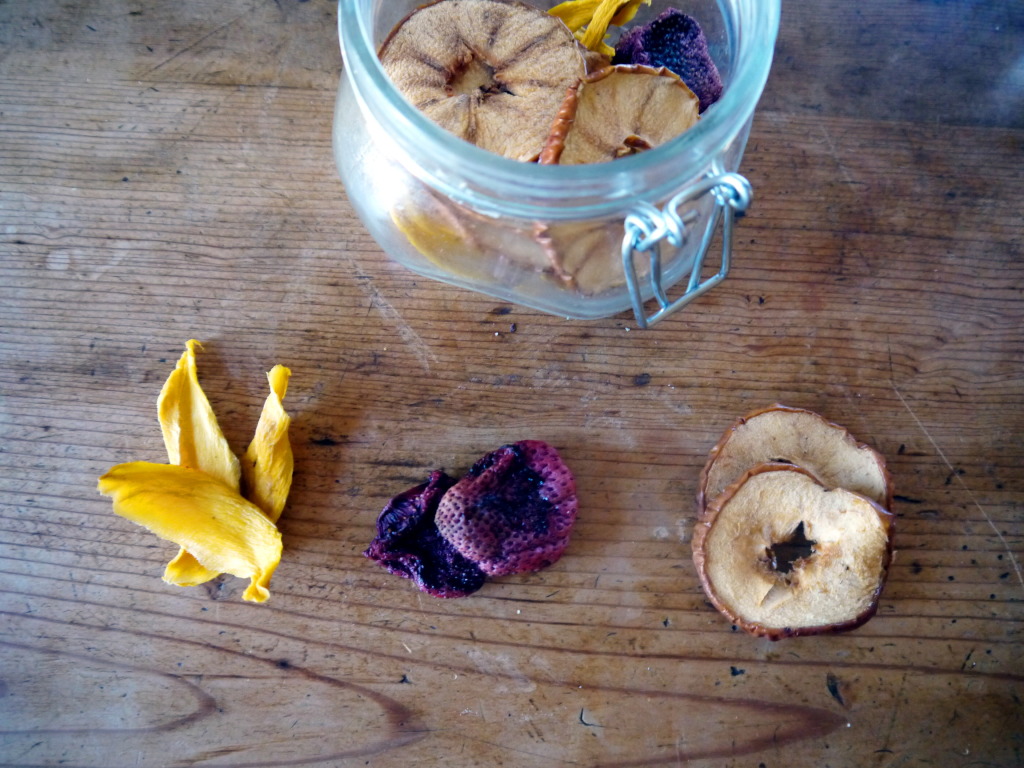
 The apples had the most unbelievable flavor and texture. The strawberries were better than gummy candy, and were sweet and tangy at the same time. The mangoes tasted exactly like one’s from Trader Joe’s. My mom and I were both kind of surprised with how truly DELICIOUS these homemade dried fruits were! I think I’ll stick to buying Trader Joe’s dried mangoes when my self-control allows me to have dried fruit around the house, but I’ll definitely make the dried apples and strawberries again. I have grand visions of the snacking on the dried strawberries during movies instead of Twizzlers…


Bringing the snacks to some taste testers…
- Mango, peeled, cored, and sliced
- Large strawberries, stems removed
- Apples, cored and thickly sliced
- Turn your oven as low as it will go. For some, it is 200 degrees F and for others it is 130 degrees F. The lower the heat, the more time it will take to dry the fruit but usually better the texture
- I set my oven to 140, and then cranked it up to 190 when I took out the mangos
- Place the fruit on a baking sheet, and do not allow each piece to touch
- Put in the oven, and let them start their long drying process
- After a couple hours, check in on your fruits. You will likely want to flip the mango and the apple slices
- Continue to monitor the fruit for texture and dryness that you're looking for. Most fruit will take 8-12 hours to dry, depending on the heat of your oven and the thickness of your fruit
- The mangos took 8 hours
- The apples took 12 hours
- The strawberries took 14 hours
- Remove from oven once finished drying, and store in a glass jar or plastic bag.
- They will last for months!